Showing posts with label Annie Sloan Chalk Paint. Show all posts

Tuesday, April 3, 2012

The File Bench, and How (Not) to Remove Veneer

This is a long tale full of indifference and bad decisions, but it has a happy ending. 

My sister found this on the street and left it in my mother's garage, where it sat for a couple of years until I decided it was fair game.

 The veneer was damaged, chipped and peeling on top,

and I wasn't a huge fan of the cut designs in the wood,

but I did like the nice looking cedar inside.

At first I thought I would fill in the missing veneer with a little wood filler, but it seemed so brittle that I decided to peel it all off.  Important note:  If you ever peel a piece of veneer off a piece of furniture, don't assume that it will all come off as easily.

I did a little research on how to remove veneer and learned that it all depends on what type of glue was used.  Antique pieces have a water-soluble glue.  Newer pieces don't.  If there was any question as to whether or not this chest was an antique, I have definitely proved that it wasn't. 

I tried using a wet towel and and iron to soften the glue and "lift" the veneer.  It may have made a tiny bit of difference, but in the end it all came off due to hard work and a tremendous amount of (tried) patience.  I used a hammer to bang the end of a chisel to get underneath and chip it off bit by bit. I don't recommend this approach, but if you're desperate, it does work. 

However, even after using the orbital sander to smooth the surface, I still had with many serious gouges that needed to be filled with wood filler. 

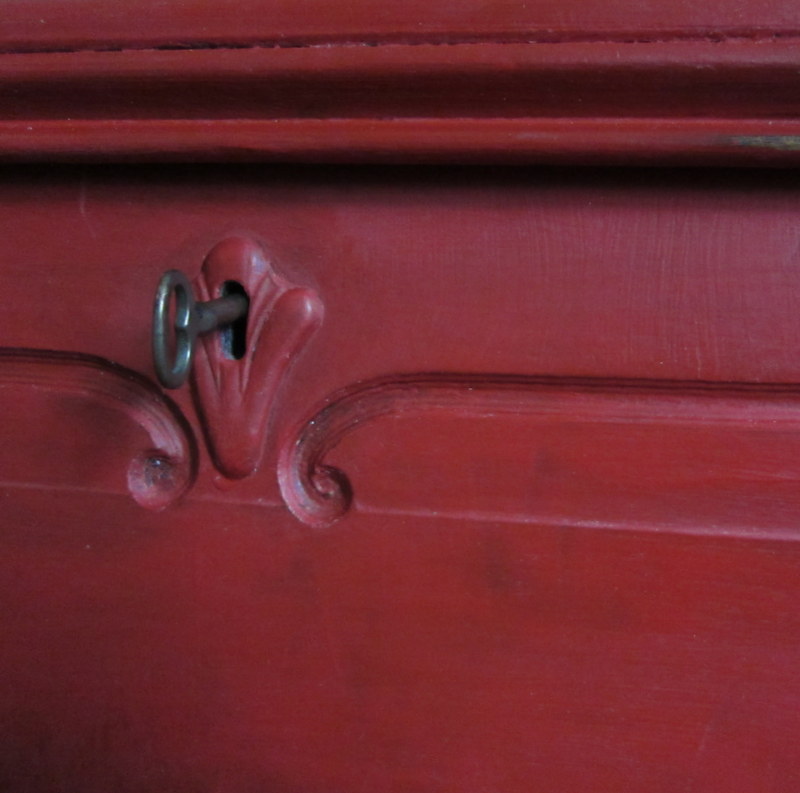
It was finally time to paint the thing.  I used Annie Sloan Chalk Paint in Empire Silk.  At first it was alarmingly hot pink, but it dried a nice, dark red.  I had to use four coats in order to cover the chest though, which isn't typically my experience with this paint.  Maybe it was very thirsty wood? 

When the paint was dry, I covered the piece in clear wax, and then did a tiny bit of distressing.  I added a little dark wax in spots, too, to give it a slightly worn and aged look.


The inspiration that got my through this long and tedious project was the new purpose the chest would serve.  We don't really have a room where this would fit at the foot of a bed, and we have little need for a place to store blankets, so I decided to turn it into a place for file storage in our office.

We used to have three file boxes sitting on the floor in this bedroom that also serves as an office area. 
They weren't much to look at and were a pain to move around whenever I vacuumed.  But now they're hidden and off the floor.

Viola.  Pretty bench serving a practical function.  If holding on to a ridiculous amount of paper is practical.  My next project should be to go through these files and find out what really needs to be saved.  For example, for how long should you save all of your pay stubs?  Is it necessary to hold on to every cancelled check since you opened a checking account?  I'm guessing... probably not.  Still, there will always be some paper documents that need a home.  And now they have a good one.

What do you think?  Was it worth the effort?  Do you have too much paper and where do you keep it?

Friday, December 9, 2011

The Ottoman Tray

Once upon a time, I made this ottoman
out of this large end table. 
And I was left with the bottom shelf. 

Then I was searching, searching, searching for a large ottoman tray, and they were expensive.  Like CRAZY $100 to $200 expensive.  So I came back to the shelf, which was obviously the perfect size for the ottomon.  I sawed off the legs and prepared to paint.

And then I had a brilliant idea.

And then my brilliant idea failed. 

But, in the end, no one would ever know it failed.

Except that I decided to tell you about it. 

My brilliant idea was to get a nautical map and decoupage it onto the tray, providing a conversation piece beneath the appetizers and drinks we would serve to guests in our living room.

It didn't go as well as I had hoped.  It's been a while since I made my cork boards and side table, and my decoupage skills were a bit rusty.  If you've never decoupaged anything, it's easy. 

How to Decoupage
1. Mix a solution of 50% glue (the regular old white kind) and 50% water. 
2. Brush the solution over whatever you want to glue it to; the surface should be clean, and preferably primed or painted.
3. Once it dries, coat with a dozen or so coats of polyurethane, until the surface is smooth and protected.

I was worried I would have trouble getting such a large item to stick (most of my experience is with wine labels, which are much smaller than maps), so I made the mistake of NOT following the instructions above and decided to brush the surface with the glue solution first, and then lay the map down.  That proved to be difficult, but I did get the map in place.  And then it started to bubble.  I brushed the decoupage solution over the top and there was more bubbling, and as I tried to gently push out those air bubbles, wrinkling.  And as I became more and more frustrated and desperate, smudging. 

If I were to get a new map and try again, I would carefully place the map, maybe tape down the corners, and gently brush the decoupage solution from the middle out until it was in place, hopefully with fewer air bubbles, and thus no wrinkles or smudges. 
Fortunately, there's a second side to the ottoman tray, but I didn't want to risk ruining it with another failed decoupage attempt.  So, I painted the whole tray using two coats of Annie Sloane's Chalk Paint in Country Grey, the same color I used on this table.  Then I used  a rag to apply a coat of Annie Sloan's Clear Wax.  If you have a piece with lots of detail, it's better to use a stiff brush, but a rag works fine when it's mostly a flat surface.  I let it dry for 24 hours, and then buffed it with a clean cloth until it was smooth. This last step takes just a few minutes and really completes the finish.  The wax just sits there until you make it shine.  For table tops (and ottoman trays), it is recommended to do 2-3 coats of wax.  I haven't done that yet, but I will.


I love how it turned out, especially the faux bamboo detailing around the edges. And no one will know what's on the other side.  Unless you are reading this now and then someday are having drinks and appetizers in my living room and ask to see it.

If you're interested in trying Annie Sloan's Chalk Paint, there's a giveaway that you can enter through Home Stories A to Z to win $150 in Annie Sloan products, and a chance to win a grand prize of a class with the master when she tours the U.S. this Spring.  Good luck!

And, have a great weekend!

P.S. I've joined the first Before and After party of 2012 on Thrifty Decor Chick.  Check it out for lots of inspiring projects.
beforeAndAfterButton

Tuesday, September 27, 2011

The Beacon Hill Table

Sometimes you just don't know where a project is going to take you.  We picked this table up off the street in Beacon Hill four years ago, and it's been taking up room in the basement since. 
If you're not familiar with Beacon Hill, it's a charming, historic section of Boston with brick sidewalks and narrow streets and many wealthy residents and lots of tourists.  I imagine that a small dog sat perched atop this table in front of a window every day for decades, awaiting its owner's return home.  That's the only way I can explain the damage to the table's surface.
I had no idea what I was going to do with this table.  The truth is, I wasn't even sure I wanted it.  But then when the living room was starting to feel too crowded, I thought I would try painting it to replace the larger table in the corner.
So, I took the orbital sander to the top to smooth it out for painting.  I used an 80-grit disc, following the direction of the wood, keeping the sander moving.  It took about 20 minutes.

And when all the finish was removed from the top, I had revealed this.

Oh, no!  It's kind of beautiful.  How can I paint over that? 

So, I had to revise my plan.  I would stain the top, and paint the legs.  It was a compromise, because removing the finish from the legs would have required days of stripping and sanding, and I wasn't at all interested in restoring the entire piece.  Did I mention that I wasn't even sure I wanted this table? 

I used a walnut gel stain for the top, applying it liberally with a rag, and then wiping off the excess with another clean rag after 3 minutes or so.  Here's a photo half way through.  I wound up doing two coats.

And for the base I used Annie Sloan Chalk Paint in Country Grey.  I'd be the 800th blogger to say how great the paint is (you don't have to sand or prime, you can leave the lid off and the paint just gets better, and you can make a beautiful wash by diluting the paint, too), so I'll just say that, like the wax, it has a little more texture, a little more something special I can't quite put my finger on.  Quality, I guess.  In the end, it's just nice paint. 

It was difficult to get into all of the little grooves in the legs with a brush,
so I left some areas uncovered.  I tried applying dark wax to the crevices to age the look of the last table I painted, and I figured I'd just be saving myself a step, and a whole lot of wax.  I did apply clear wax to the base once it was painted, and three coats of matte polyurethane to the table top.


See how smooth the clear wax makes the finish look? 
And, you might have noticed that, at least for now, the table is not in the corner, but right next to the door.  I felt like it deserved a place a little more front and center. 
So for now, the living room is one table more crowded than it was before.  It's all part of the process, I guess.  More changes to come!