Showing posts with label vegetable garden. Show all posts

Wednesday, February 8, 2012

Seed Inventory

On a whim, at the urging of someone I don't even know, I recently bought a beautiful book.

If you don’t yet own Nigel Slater’s Tender go now and buy it!Katy Elliott said.  And so, I did.

Katy is a blogger and former domino staffer who lives in a 250-year-old house she and her husband are renovating in Marblehead, Mass.  To say I don't know her isn't completely accurate, because I read her blog, and through her posts I know something about her style and taste, and it seems she knows mine, because she was right.  I had to have that book. 

Nigel Slater is a British food writer who has divided his book into vegetables- an entire chapter on kale, one on celery root, one on parsnips.  He writes about his favorite varieties, growing the vegetables, and then how to cook them, with some delightfully simple recipes, like

Fried onions
large, golden onions - 3
butter - a thick slice
oil - a small glug

with an entire page of description on not only how to cook them, but his personal history and the evolution of his relationship with the fried onion.  There are more complicated and interesting recipes, too.  And, the pictures are gorgeous.

The book is inspiring, and has got me thinking about planting the 2012 vegetable garden.  I've taken inventory of the seeds I have from last year, and have decided not to buy any.

With what's leftover from last year, I will direct seed the following:

Waltham Butternut Squash
Diva Cucumber
Costata Romenesco Zucchini
Envy Edamame
Sugar /Snow Peas
Green Butterhead Lettuce
Rocket Arugula
Tokyo Long White Scallions
Deep Purple Carrot
Early Mokum Carrot
Rainbow Carrot
Lancer Parsnip
Dill
Cilantro
Bright Lights Swiss Chard
Winterbor Kale
Renegade Spinach
Red Ace Beet

And, I'm going to try to plant some seeds my mom saved from the best melon she ever tasted.  I have no idea what kind of melon it is, but if we are successful, it won't matter. 

For the first time, I'm going to try to start some tomato seeds indoors, including those saved from a family heirloom tomato my friend Sharon gave to me. I also saved the Brandywine and Black Cherry tomato seeds from last year.

I'll buy the rest from the garden center: basil, eggplant, Sun Gold tomatoes, peppers, shallots, leeks, and maybe some red onion.  We did well with things in the onion family last year, because the bugs and animals don't like them.

If we do build another small plot closer to the house (very dependant on how long the bathroom reno takes), I think I'll just spread out our plantings, and maybe add more tomatoes.  We had such an iffy 2011, I'd like to succeed at some of the things we tried and failed at last year before trying anything new (though, brussel sprouts, potatoes, and baby broccoli are on my wish list).  Just because we grew peas and edamame and cilantro and cucumbers and butternut squash and lettuce and purple carrots last year doesn't mean we got to eat them.  And, we've already got the seeds.  So, the garden should be much more cost-effective this year, and still full of new rewards.  I hope. 

Now I need to come up with a rotation that puts things in a different place than they were in last year, but still next to the companions they like best.  And, I've got to research a very low-maintenance way to start tomato seeds indoors. 

Are you planning to plant anything new in 2012?  Have you started seeds indoors?  Do you know how to attract the good bugs that eat the bad bugs? 

Tuesday, December 6, 2011

Weekend Harvest

While I was out in the garden picking arugula for Sunday's soup, I decided it was time to give up on the carrots and beets I planted in August.  It's December.  I think that's fair.  I pulled a modest harvest, and we used what we had for dinner.
I had a chicken to roast, and thought we'd have some carrots, beets and leeks roasted alongside. The largest carrots were pretty small,

so I had to supplement with a few of the store-bought variety.  I also used the parsley and chives, which continue to grow gloriously, for an herbed quinoa that was delicious.

Oh why, oh why did my vegetables not grow?  I give up.  That's a problem I will try to understand next year.   We have more leeks and scallions and herbs to enjoy in the meantime, and in the Spring, maybe some parsnips. Fingers crossed.

Monday, December 5, 2011

Sunday Soups: White Bean, Potato and Arugula

It's December and we've still got vegetables in the garden, thanks to the mild weather we've been having.  I picked some arugula and decided it was time for one of my favorite soups.

I have never bothered to try the original recipe, but like the ingredients and find that it is delicious even with lots of short cuts.  I don't doubt that the real recipe is great, but I like a soup that I can make quickly, usually while I'm also making dinner.  The bottom line is, it calls for 10 cloves of garlic, so how can you go wrong?  (That actually seems excessive to me, and I love garlic, so sometimes I use a little less.)

White Bean, Potato and Arugula Soup
adapted from Bon Appetit

1 15 oz. can of cannelini
2 bay leaves
6 tablespoons olive oil
1 teaspoon fresh rosemary, chopped
2 cups Yukon Gold potato, cut into 1/2-inch pieces (I don't even bother to peel them)
10 garlic cloves, chopped
6 cups low-salt chicken broth
3 cups arugula, tough stems removed, chopped
1 teaspoon dried crushed red pepper
salt and pepper to taste

Heat 6 tablespoons olive oil in a large pot over medium heat. Add potato pieces and sauté until brown in spots, about 8 minutes. Add garlic and rosemary, and sauté until garlic begins to color, about 3 minutes. Add 6 cups chicken broth and bay leaves, and boil until potato pieces are falling apart, about 10 minutes. Add beans and parmesan rind and bring to boil.  Reduce heat and simmer just until beans are tender, about 10 minutes. Season soup generously with salt and pepper. Stir arugula and crushed red pepper into soup, and simmer 5 minutes. Remove the bay leaves and parmesan rind.  Serve topped with parmesan, if you'd like.

Yum.

Wednesday, November 2, 2011

Potted Herbs

I decided to try bringing some herbs in for the Winter. 
The rosemary won't perennialize in these parts anyway, so I have nothing to lose there. I also dug up some chives and mint, because one of my handy garden books listed them as easy to bring indoors.  (They also recommend parsley and marjoram.)  I put them in a little potting soil, and watered them really well. 
And, I painted some basic terra cotta pots with chalkboard paint, for fun, because it's not so hard to tell these three apart. We'll see how long it lasts.

Have you had any success growing herbs indoors?

Monday, October 31, 2011

Tricks and Treats

We went for a walk by the water on Saturday morning, anticipating that a big Nor'Easter was going to keep us indoors for the rest of the weekend.

But the storm just brought rain and wind to the coast.  A lot of our neighbors to the West got a foot of snow, and a few places got as many as thirty inches.  Two days before Halloween??  Mother Nature is tricky.

There were also treats.  We had a beautiful sunny day on Sunday, we harvested some arugula (no holes!) for a perfect salad (olive oil, salt, pepper = perfection),
and we got to enjoy our newly delivered stove and microwave. 

While it's not the most fascinating story, I thought I'd explain a little about our stove/microwave decision process.  Here's a before photo:
Aside from the appliances appearing dated, some of the finish was peeling on both.  More importantly, there were a few cooking problems.  The oven door did not open all the way.  You could still get big things in and out, but there was delicate maneuvering involved.  Also, the two large burners were starting to go, so I'd be waiting and waiting for a pot of water to boil, only to find that the burner wasn't hot at all.  Sometimes I could jiggle the burner and get it to start up again, but the process was getting old. 

I did look at replacing the burners, and the receptacles, which connect the burner to the electricity, because it was really those that had corroded and were causing the problem.  It was going to cost $100.  That would be reasonable, but then we had to consider how old our stove was.  We didn't know for sure, but once I found out that Caloric ranges stopped being made in the early 90's, I was convinced it was not worth the repair.  This was confirmed with an estimate that the average life expectancy of an electric range is 17 years.  It would only be a matter of time before the oven went, and one of my greatest fears was that it would be on Thanksgiving day, when we had over 20 people at our house. 

With Thanksgiving in mind, I wanted to maximize our cooking ability with the new appliances.  I went for a double oven, and a microwave with a convection feature, so we could be cooking things at three different temperatures all at once. Luxury!  I also knew I wanted to update with stainless steel.  If I had all the choices in the world, I would have selected a gas stove over electric, but we don't have gas in our house, or our town for that matter, so that will remain a dream.  I used Consumer Reports to narrow it down, and wound up choosing the Maytag Gemini and matching microwave because, while the ratings were similar, the Maytag appliances were more affordable than their GE counterparts.  I also liked the appearance better, and our less-than-a-year-old refrigerator is a Maytag, so there would be no issue with matching the stainless.

Without further ado, here it is:

Pretty, right?  Don't look to the right, because you'll see our antique dishwasher with a peeling finish, and the windows above the sink that have been taken apart and cobbled back together while waiting for a new window unit to arrive.  After Thanksgiving.  Oh, well. We are happy with the new appliances.

Wishing you a happy Halloween, with lots of treats!

Wednesday, October 19, 2011

Planting the Garlic

We finally got around to it.  Garlic should be planted about a month before the ground freezes (in areas where the ground does freeze).  I'm hoping that the mild weather has bought us some time. 

We planted 16 cloves last year and harvested 6 usable bulbs.  I can only blame myself for that, because the animals and bugs have left everything in the onion family alone in our garden.  I think I may have been overwatering; I'm not sure.  The goal is to re-plant some of what you grow, so we've sacrificed one bulb for that purpose.  

There are stiff-neck garlics and soft-neck garlics.  The soft-neck are what you usually find in the grocery store. The stiff-necks are the ones that grow scapes, which I prefer because we get to enjoy a pre-harvest treat.  They have a core at the center that the cloves grow around.
 
For best results, it's recommended that you order from a seed company in your region.  I found I had to order mid-Summer to have my choice, and they shipped it to me in the Fall.  You can try using store-bought garlic, but it has probably been treated so it won't sprout.

Last year's garlic was German Extra Hardy. I also ordered some Russian Red from Johnny's Seeds, and then a variety called Persian Star from Botanical Interests, once I realized we didn't have much of our own to plant and everything was already selling out. 
The Persian Star, at the top of the photo, was the nicest looking garlic with the biggest cloves.  That's our home-grown German Extra Hardy on the right, and Russian Red on the left.
We cleared the area where the edamame and some tomatoes were growing, and turned the soil.  The cloves get planted six inches apart, and pushed flat side down 2 inches into the soil, so the pointy end sticks out the tiniest bit at the top. 
I think we planted 46 cloves.  That ought to bring us a bigger harvest next year!  Once the leaves fall, we'll use them to cover the bed until Spring, when we'll remove the leaves so the sprouting garlic can poke through.

We'll also harvest the parsnips in the Spring. 
They're supposed to taste sweeter after they've been in the ground all Winter. 

A few other things are still making a go of it in the garden.  A couple more baby eggplants from the plant that keeps on giving.
Carrots, which I hope will poke through soon, because we'll need to harvest before we get a real frost.
Plenty of scallions.
And, since most of the bugs have died off, maybe some arugula?
In light of many failures, there are still a few successes.  It was good to get back in the garden, and start thinking about what we'll grow next year.

Friday, October 7, 2011

Fall Flowers, Weekend Plans


Despite a few pretty things still struggling to make us look good, our yard is looking like a hot mess these days.  This Montauk (or Nippon) Daisy is a good example.  It's in full bloom, as it should be in October
but it's looking rather leggy.  I looked it up and learned that I should cut it down to 8 inches in May to keep this from happening.  Good to know.  Next year.

This hydrangea has performed for us beautifully, inside and out, since June,
but it looks like it could really use a little breathing room.

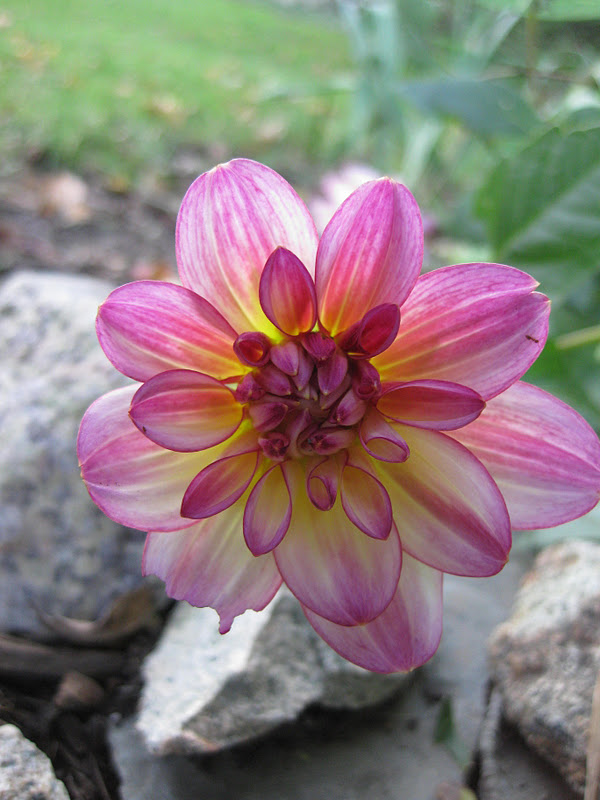
The dahlias were crowded out from the beginning and infested by something that ate most of the foliage, but this sad little flower still perseveres.

Speaking of persevering, it looks like the zucchini feels guilty for only providing us with a handful or so over the summer.  It's still trying to make a go of it.
Do you see the baby zucchinis at the bottom?  They just might have a shot, because we're expecting unusually warm temperatures this weekend.  It's supposed to be 84 degrees on Sunday.

In addition to doing some yard clean-up this weekend, we've got garlic and tulip bulbs to plant, a few painting projects to finish up, and maybe a little project involving seaweed.  (Seaweed?  I'll share more on that next week if we get to it.)  Since it's going to be so beautiful, we're also determined to get in one last trip in the kayaks. 

Have a happy weekend everyone!

Monday, October 3, 2011

Sunday Soups: Fall Minestrone

This is my standard minestrone recipe, only I've swapped out zucchini and tomatoes for butternut squash and kale, because that's what we have in the garden this time of year.

I'm totally lying.  Doesn't that sound great, though?  I would love to be able to say that most of the vegetables in this soup came from the garden.  But, in our garden, every single little butternut squash spontaneously aborted before it actually started growing, and the kale that wasn't eaten by an unidentified animal has stopped growing. 
 
In the meantime, I'm glad grocery stores sell the things that won't grow in our yard.
I should also acknowledge the plants that did grow for us and contribute to this soup- the garlic and parsley- for which we are very grateful.

Fall Minestrone

1/4 cup olive oil
4 oz. pancetta, cubed (Trader Joes sells a little package already chopped- handy!)
2 cloves garlic, minced
1 cup onion, chopped
1 cup carrot, chopped
1 cup celery, chopped
1 teaspoon kosher salt
3/4 teaspoon fresh ground pepper
1 1/2 cups butternut squash, cubed
1 cup potato, cubed 
6 cups chicken broth
4 cups kale, stems removed, and chopped
1 can of cannellini
minced parsley
grated parmesan

1. Heat the olive oil in your soup pot and add the garlic and pancetta, and sauté  for 2 minutes.
2. Add the onion, carrot, celery, salt and pepper, and cover, cooking over medium heat for 5 minutes.
3. Add the butternut squash and potato, and cover to cook again, for 10 minutes.
4. Add the broth, cannellini, and kale and cook until the greens are tender, about another 10 minutes.
5. Serve topped with minced parsley and grated parmesan.

It's just the right thing on a cool evening, when it's starting to feel like Fall is settling in.

Bon appétit!

Monday, September 26, 2011

Sunday Soups: Lentil Vegetable

I hope everyone had a great weekend.  I went for a couple of nice walks each day, but our weather has been alternating between rain and humidity, giving me reason to keep busy with some indoor projects, one of which I'll share with you tomorrow.  I was so preoccupied with projects that I forgot to start the soup on time. This is a very simple soup to make, but you need to start it early- not, say, at 5:45 if you're expecting to have it for dinner.  I was planning to serve it with sausage on top and a fresh baguette I picked up at the bakery, but we wound up having grilled sausage, garden tomato salad and some of the baguette for dinner.  It was fantastic; I can't really complain.  We'll eat this soup for lunch all week.

I've stolen ideas from a few different recipes to put this together.  I'm basically following the Moosewood  Cookbook recipe, with a nod to the Barefoot Contessa, who adds leeks, and my friend Lisa, who adds sausage.  The sausage makes the soup heartier for dinner, but without it, you have a healthy, vegetarian lunch. 
These are the first leeks I've pulled from our garden, after they've been trimmed up nicely.  They didn't grow to be too big, but they still taste like leeks.

Lentil Vegetable Soup
adapted from the Moosewood Cookbook

Simmer for 3-4 hours:
1 16 ounce bag raw lentils
7 cups water
2 teaspoons salt

Sauté in olive oil in a separate pan for about 20 minutes as you're approaching the 3-4 hour mark:
2 teaspoons minced garlic
1 cup chopped onion
1 cup chopped celery
1 cup chopped carrots
1 cup chopped leeks (white part only)
1 teaspoon chopped fresh thyme
1 teaspoon chopped fresh oregano

Once the vegetables soften, add them to the lentils and continue to simmer for half an hour over low heat, while you add the final ingredients:
lots of black pepper
1 1/2 cups chopped fresh tomatoes
2 Tablespoons dry red wine (which means you have to open a bottle and have a glass or two)
2 Tablespoons lemon juice
1 1/2 Tablespoons brown sugar (or molasses)
1 Tablespoon red wine vinegar

Top with fresh chopped scallions and a sprinkle of red wine vinegar.  And sausage, if you are so inclined.  We often have it with sweet Italian, but chicken apple also adds a special twist.
Enjoy!

Wednesday, September 21, 2011

Next Year's Tomatoes

My friend Sharon's grandfather created his own heirloom tomato, and her family has been saving the seeds for many years to keep them going.  I was lucky enough to receive a beautiful tomato and told how to save the seeds for next year.
Sharon's method was simple.  She said to scoop out the seeds and put them on a paper towel to let them dry for a few days. Then seal them in an air-tight container and store in a cool, dry place until you're ready to plant.  Dave's Garden outlines a similar process.

I had to complicate matters by Googling "saving tomato seeds" and reading all about fermenting the tomato seeds first, which isn't necessary, but helps to sort out the bad seeds, and is "good etiquette" if you're planning to trade seeds.  I like the idea of simple, but the fermentation process intrigued me, and didn't seem like much more work. 

1) I took my very ripe tomato and scooped out the seeds and put them in a jar with 1/4 cup of water.
2. After 3-5 days in a sealed jar, a film and some mold grew on top.
I skimmed the mold/film off the top, and then added some water and stirred.  The good seeds will supposedly sink to the bottom. I carefully poured out the water and bits of pulp, using the spoon to hold back the bunch of seeds.

3. I put the seeds on a paper plate to absorb some of the liquid and help them dry faster. 

4. I put them in an air-tight container (a Ziploc) and stored in a cool dry place (the basement). 

I'm going to do this with one of our Brandywine tomatoes now that they're finally looking healthy and ripe,
and our Black Cherry tomatoes,
because we picked up the plant in Vermont and I didn't see that variety at any of our local gardening centers.  I know they look green here, but even at their ripest, there's still a little green on top.  They are delicious, and look so pretty in a salad with the Sun Gold and Sweet Cherry tomatoes.

Assuming that at least some of these seeds grow to be plants, we can invest in a few new varieties next year.  Do you have a favorite tomato that you've grown?  What else should we try?


Thursday, September 15, 2011

Behold the Brandywine

We finally have a tomato we can eat. 
We have been enjoying cherry tomatoes for a couple of months now, but this is our first real tomato.  Tonight there will be tomato salad.  My great aunt used to make "August 1st Tomato Salad" with garden tomatoes, garlic, onion, olive oil, red wine vinegar, oregano, and other fresh herbs.  I will make "September 15th Tomato Salad."

We threw away the first several before they ripened because they looked diseased.

I started feeding them fish emulsion, every other week, in early August, I think.  After that, someone said they looked like they needed calcium, so I dissolved some epsom salts in water and sprinkled those around the base of the tomato plant.  I don't know if one or both of these is the reason for success, but I will definitely be testing the soil next year, and feeding the tomatoes.

I also have high hopes for these guys, waiting in the wings.
Have a beautiful day!

Friday, April 15, 2011

Perennial Herbs

I was having lunch with my friend Jen the other day (shoutout to Jen!) and she said her family goes away for several weeks at a time in the summer, which prevents them from starting a vegetable garden, because no one is around to water it. One of my favorite things about perennial herbs is that you can get the satisfaction of growing something to eat without doing much work.  They don't really care if you water them, and some actually thrive on neglect, and most of us are pretty good at that.  You only have to plant them once and you can enjoy them year after year.  That's much more satisfying than spending four dollars at the grocery store, using a small amount, and then retrieving the rotted remains from your crisper drawer weeks later.  (C'mon-  that happens to everybody.  Right?)

To make room for more vegetables, we moved a few perennial herbs to a bed of flowers and shrubs yesterday, and I was inspired to share my cheat sheet for Jen and others who might be interested in starting a little effort/high reward perennial herb garden.  I've also added a few little notes about what we like to do with them.

CHIVES
They like a sunny spot with good drainage. Don't take more than 1/3 of the plant at a time.  Divide them (just dig it up, split it, and replant in two separate holes) every 3 years.
We snip a few and stir them into scrambled eggs with some cheddar cheese almost every weekend.  You have to snip the fluffy purple flowers to keep the plant growing, and they're edible, too!  I think they're a little too weird in eggs, but you can chop them up for color and flavor in a simple green salad, or you can stir them into some goat cheese with a little lemon juice and zest, some parsley, salt, pepper and olive oil to make a pretty and tasty spread for bread or crackers.  


OREGANO
They like a sunny spot, but some shade is okay, too.  After it comes up in the Spring, cut it back by a third.  Every 2 or 3 years, divide into a few plants.  I don't know if all oregano grows big, but our plant is gigantic- like a small bush.  I didn't expect it to grow so large, and it wound up pushing all of its neighbors out of the way, including the cucumber, which is a pretty pushy neighbor.  We could never possibly use it all, so I'd suggest that you don't grow any, and just ask me for some. 
You can use oregano in just about everything, but we regularly use it in this quick week night dinner from Food and Wine- Eggplant Tomato and Fresh Ricotta Farfalle.


LAVENDER
Plant it on a sandy, South facing slope that gets plenty of sun.  Prune a couple inches off the stems in the Spring for established plants.  Every 2-3 years shear it back to 6-8 inches.
I'll admit I've never used it in the kitchen.  I just like to run my hand over it and smell.  I'll do some experimentation this year and report back.  I've seen it used in a rub for chicken with other herbs, like oregano and thyme.  You can mix it in when baking chocolate desserts, too.


MINT
Most people complain about overgrowth when they talk about mint, but so far, our apple mint and spearmint are under control.  We were told to plant them near more established perennials with bigger roots (like hydrangea) and they won't go too crazy.  So far, so good.  I may have to eat my words. 
In the meantime, we like to use our mint in cocktails, like Absolut Citron, lemonade and crushed mint.


SAGE
It likes a sunny spot, but tolerates afternoon shade.  Good drainage is important, and then leave it alone. They say you can split it every two to three years, but you should also replace the plant after four or five, because it will lose it's flavor.  We'll probably skip the splitting and just replace it, as it doesn't seem to split as easily as chives or oregano.
We roast butternut squash, garlic and sage (add a little olive oil, salt and pepper, too) in the oven and then toss it with pasta, pine nuts and parmesan.


THYME
I read that you're supposed to cut it back mercilessly in Spring, but mine hasn't grown back very well each time I've done this, with two different plants.  I'm going to plant a third this year and not cut it back next Spring and see what happens.
We use thyme with so many things, but my favorite is this carrot dish that has become a regular favorite when we have big family meals. 


TARRAGON
Buy French not Russian, which is flavorless.  It's not a pretty plant, and it thrives on neglect.  Cut it back when it begins to flower, and harvest often to promote growth.  Divide clumps in the Spring to renew the plant.  It should be replaced after 3 to 5 years.
I love to chop it up and put it on roasted chicken with lots of lemon. 

My last note is this: When you go to the garden center to buy your herb plants, taste them first.  There are different varieties and some will taste better to you than others.
Do you have any great recipes to share using fresh herbs?