Tuesday, May 31, 2011

Chive Blossoms

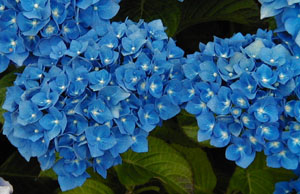
We had some company on Sunday, and though there's not much to serve from the garden at this stage, the event coincided nicely with a great many chive blossoms that needed to be consumed.
Well, I guess they didn't need to be consumed, but they had to be snipped.  At least, I think they had to be snipped, but I'm not exactly sure why.  If you leave them on, they will go to seed, and that means...  I'd get more chives?  I'm not sure, but I think that's a good thing.  I'm still following directions, though, and my book says to snip the blossoms, so I did, and why not use them for something?


I found a few recipes online and tried two, but I didn't follow either to the letter.  You can always count on me to give a recipe a half-hearted attempt.  I look at anything with more than three steps and think, how can I make this easier?

Alas, I took a bunch of the blossoms and chopped off the stems so they broke into little purple bits and mashed them into some goat cheese.  Like this recipe, I added some lemon zest (half a lemon's worth) and some lemon juice (a whole lemon's worth- too much, I think), some olive oil, kosher salt, and lots of fresh ground pepper.  I should have thrown some chives and/or parsley in there, too, and maybe some honey instead of lemon as suggested here, but I didn't.  There's always next time.

Last night, we had some leftovers from Sunday's grilling, but I also had some asparagus that needed to be used, and more chive blossoms remaining, so I gave this a go: Asparagus with Sesame and Chive Blossoms.  The asparagus spears were really thin so I skipped the blanching step and just sauteed them in some olive oil, adding salt and pepper, and some sesame seeds.  Against my better judgement, I added a couple of shakes of soy sauce like the recipe calls for (asparagus and soy sauce didn't go together for me), and it was a good decision.  At the end I tossed in the chive blossoms and covered the pan to steam the chive blossoms for a minute or two.  It was quick and delicious, and pretty, too, but it was late and I was too tired to take pictures.  Sorry. 

And that was my foray into cooking with chive blossoms.  Did you cook or eat anything delicious over the long holiday weekend?

Thursday, May 26, 2011

Summer is Coming

It may already be here.  I've been cooped up in a negotiating seminar for the last couple of days, but now I am FREE, and can finally enjoy that it has stopped raining and the sun is shining.  And it's warm.  It feels like summer, leading up to this first weekend of the summer season.  I am taking tomorrow off to clean the house and spread mulch, because that's how I roll, and then I'm looking forward to visiting the nearby North River Arts Festival, hanging out with friends, grilling and enjoying the good weather.

Some other things I'm looking to do in the near future:

1) Negotiating a good deal on the sofa I've been stalking.

2. Making a decision about window coverings for the above living room.  I was thinking I would get some simple ivory twill roman shades

and then introduce them to the glue gun, and some trim like this
But now I'm leaning toward something with more texture.  I love this seagrass.


3. Doing a quick makeover of this lamp I picked up for zero dollars at a yard sale last weekend.
You might think it was worth zero dollars, but I'm going to turn it into a fine specimen for our porch.

4. Wash the inside of all of our windows.  I did the outside last weekend.  Or was that the weekend before?  It's always such a long process.

5. Scrub and stain the porch.

What projects or fun weekend plans are you thinking about?

Tuesday, May 24, 2011

Learning about Hydrangea

In addition to the "Rhododendron Festival," there was an informal hydrangea seminar at Heritage Gardens on Sunday with Mal Condon, an expert from Nantucket.  Check out his site at hydrangeafarm.com.   (They have a summer camp!  $200 a night, 2 campers at a time.  Is that an affordable Nantucket vacation?)

I am not going to pretend to have absorbed enough wisdom and expertise to pass it all on to you.  Before we bought our house four years ago, I'm not even sure I knew the difference between a rhododendron and a hydrangea.  Growing up, my mom would say things like, "OHHH, LOOOOK at the RHODODENDRON!!!  Aren't they GOOORGEOUS???"  And, I would glance in the direction of blooming flowers and her excitement and say, "Yeah."  But I didn't really know which flowers were the rhododendron, and I didn't really care.  I started caring once we had a house and I began identifying the plants in our own yard, and those in other yards that I wanted to see in our yard.  I can now proudly distinguish a hydrangea from a rhododendron, but an expert I am not.

Still, let me tell you the two main things I took away from the hour we spent with Mal learning about hydrangeas.

1.  Don't be afraid to prune. 
My mom has lots of beautiful established hydrangeas in her yard, but after making the mistake of pruning one year and having no flowers, we have both  been hesitant to touch them.  Mal, however, was very comfortable with his pruning shears.  He said the best time to prune away the dead stems is in March, but that didn't stop him from cutting away lots and lots of them at the end of May.  If it didn't have any leaf growth, it was dead, and he cut it out.  Even if it did have some leaf growth, he cut down to the last flower node, removing the dead part from the top of the branch.  This inspired me and my mom to do a little clean up on her shrubs when we got home.
Before:

After:

He said that the next time to prune is in July, just after they've flowered.  That's when you want to shape the shrub, trimming for a uniform look at the top, and removing any branches that cross each other from the bottom. 

2. There is more than one way to propogate.  And, I did it wrong.
Last year, I tried to make my own hydrangea, taking clippings from my mom's house.  I'll do this again next month and post a step-by-step of the process.  We did a total of twenty clippings and I have two and a half plants to show for it.


(I'm only counting this one as a half because it's much smaller than the others and I'm not sure it's going to make it.)

I am actually very happy with a  little bit greater than 10% success rate, but I learned a few things that I'll do differently next time.  For one, Mal said that he keeps propogated hydrangea in a pot for at least one winter before planting it, storing it in a garage or shed to shelter it from the wind.  I didn't do that.

I also learned that an easier way to propogate is to bury one of the branches on an established shrub and let it turn into a new plant.  I'll try that next month, too.

Lastly, while he was going crazy with his pruning shears, Mal knocked off some new growth from the top of a few plants and gave them to us.  He said we could just stick them in dirt and mist them and in two weeks we'd have roots.  So, here they are.


If they survive, someday they will look like this:
Hydrangea Lilacina
Hydrangea Enziandom
Mal also spent some time talking about fertilizing, which is something I haven't really done much or any of, and I should probably start.  I haven't tested the soil in our garden beds, but I know that generally in our area the soil leans toward being acidic.  You can influence the color of hydrangea by playing with the balance of the pH. If you want your blue hydrangeas to be pink, you must stop the plants from taking up aluminum from the soil.  I have to learn more about this manipulation some day, but for now, I'd be thrilled to see either pink or blue flowers in my yard.

Monday, May 23, 2011

Heritage Gardens

Yesterday my mom and I went to Heritage Gardens in Sandwich to look at the rhododendrons in bloom. 


And then the battery ran out on my camera.

Our main reason for being there was for an informal lesson on caring for hydrangeas.  I'll tell you more about what we learned tomorrow.

In the afternoon, I planted an herb garden for my mom.  I had to take this picture with my phone. I found a spot for her perennial herbs (tarragon, oregano, sage, chives and two kinds of thyme) on a bed along a rock wall on the side of the house.

And then my phone battery died, so I had to take this picture with my sister's phone.  I put some mint and her annual herbs (Thai basil, Italian basil, parsley and dill)in a bed right outside her kitchen window, so she'll remember to water them.
 I am looking forward to see how much they've grown next time I visit.

Friday, May 20, 2011

The Yellow Room

A while ago I shared this picture of one of our bedrooms, taken before we moved in.

The wall was knocked down, the carpet was torn up, baseboard was added, the floor was finished, and everything was painted.  (It sounds so simple summed up like that...)

And here are some after shots:


(Where's the wall obstructing all flow??)


We're using what we have and the decorating is spare for the moment.  I saved that window treatment from an old apartment for 10 years and was determined to use it, but I'm not sure it's going to work.  I have to play with it some more.  There will be a desk and office storage area across from the bed, but I'm still looking for the storage half of it, so our disorganized mess is elsewhere until that comes together. 

Did you notice the paint samples in the hallway in the last photo?  We're stripping the wallpaper and painting out there as part of our next big project.  I think we've settled on the second from the top, Benjamin Moore Oatmeal.  I'll tell you more about those plans later.  For now, I want to enjoy the finished projects.

Happy weekend!

Wednesday, May 18, 2011

Inspiration

One of the blogs I follow is from Katy Elliott, a former Domino writer who lives in Marblehead and is in the process of renovating a 260-year-old house.  Last week she showed pretty pictures of tulips in Ben Petreath's garden, and said, "If you're not reading Ben's blog, you should."  I dutifully clicked over and liked what I saw.  His blog is called Inspiration.  Yesterday, he showed before and after pictures of a new border garden he planted last September.

Ben Petreath Ltd.  Inspiration


 Ben Petreath Ltd. Inspiration
 
Ben Petreath Ltd. Inspiration
Consider me inspired.  I dream that some day our garden bed around the rock wall alongside the road will be half as amazing.
The daffodil and narcissus blooms are mostly gone, and the few tulips held strong for quite a while, but the end is near.

The solomon's seal is up
and it looks like we'll have irises soon.
After that it's daylilies, then a few coneflowers, new this year.

Tuesday, May 17, 2011

Homemade Ricotta

I snuck in a little experiment while we were finishing our work upstairs on Sunday.  Two years ago I saw this article in Food & Wine about making your own ricotta that I've been wanting to try since.  I bought some cheesecloth soon after that, which I was glad to have when I finally got around to it this weekend.  It takes a few hours in total, but only about 20 minutes of active work, and in the end, you can say you made cheese! 

First, take two quarts of whole milk and a cup of heavy cream, and put it on moderate to high heat on the stove.  Heat it until the milk froths and steams at the top, but do not let it boil.  I used my meat thermometer to see when it got to 185 degrees, and then I immediately took it off the heat.

Add 3 tablespoons of white distilled vinegar and stir for 30 seconds.  Add 1/2 a teaspoon of salt and stir for another 30 seconds.  Cover the pot with a towel and let it sit for 2 hours.

After two hours, you can use a slotted spoon to take the curds from the liquid, and transfer them into a strainer lined with several layers (I used six) of cheesecloth.

I found that was easy enough in the beginning, but it didn't take long for the curds to be few and far between, floating in a sea of whey, so I wound up just pouring all the contents of the pot through the cheesecloth-lined strainer.  Then I gathered the cloth together and wrapped a rubber band around the top, and let the whey continue to drain out for a half hour, squeezing it a few times to push the liquid out.

And in the end, there was cheese!

Is it more delicious than the ricotta you buy in a store?  I think so, but I'm biased because I'm proud.  I would say it is fresher, lighter and creamier than what you get in a store-bought container.  And I would do it again.  I've read that you can vary the ingredients (lemon or buttermilk instead of vinegar) and the amount of time you heat the milk or drain the cheese to produce a different texture.  I might drain mine a little less next time. 

I used these ingredients to make a quick dinner, adapted from this recipe, also from Food & Wine.
I sauteed the eggplant in olive oil, then set it aside.  While I had a pound of pasta cooking, I sauteed two cloves of garlic, some crushed red pepper, the fresh oregano, zucchini and grape tomatoes in a little more olive oil.  I added the eggplant back in, salt and pepper, and 1 cup of the pasta water, and then tossed it all with the pasta.  I served the pasta in bowls, with a big dollup of fresh ricotta and a sprinkling of parmesan on top. 

We also topped the pasta with these amazing breadcrumbs leftover from last week when I brought home broccolini from the grocery store and didn't know what to do with it.  Have you tried broccolini?  It was my first time and upon eating it I immediately did a Google search to see if we could grow it.  It turns out it's a patented vegetable (?), a cross between kale and broccoli, that we'll have to keep buying in the store.  Delicious.  I digress. 

I look forward to trying this recipe again when we can take the eggplant, zucchini and tomatoes from the garden.  Do you have any good recipes with ricotta?  Have you ever made cheese, or would you try?  I highly recommend it. 

P.S. It's spray paint season (if the rain ever stops).  Check out this Spray Paint Party for inspiration.  I posted a link to my porch furniture makeover.
[image[7].png]

Monday, May 16, 2011

Veggies Are In

I am really looking forward to warm weather and weekends when we forget our projects and spend days hanging out at the beach, lingering until the sun goes down.  Until then, we had a "perfect weekend," dry on Saturday for our outdoor planting, and rainy on Sunday, forcing us inside to finally finish a couple of loose ends upstairs.  Pictures of a bedroom makeover coming soon.

Our 10-day forecast consists of all rain, which isn't good for me or the veggies.  They need water, of course, but the seedlings seem to be slow going without much sun.  We do have carrots sprouting. These are too close together and need to be thinned out, I think.  They are the tiniest seeds and difficult to place with any precision.
Beets, too.  Once again, I am not an expert in seed placement.

There were two highlights for me on Saturday.  The first was planting leeks. If I wasn't covered in dirt by that time, I would have taken some pictures, because it was such an interesting process.  The leeks came in a 4-inch pot, and looked like a clump of grass. 
First, I teased them apart at the roots so I had a lot of single blades of grass, then trimmed down the roots so they were only 2 inches long.  It was a somewhat tedious, but oddly satisfying task. We dug three 8-inch deep trenches in a 36" x 36" spot, and set out the individual blades of grass about six inches apart.  Finally, we filled in the trench so there are just these random blades of grass sticking out of the earth. 
These little blades of grass are supposedly going to grow to look something like the garlic (but they'll be leeks).  Speaking of garlic, look at that stuff grow.
Those are shallots in front.  And here's the whole garden.
You can see someone has started building a rock wall around the border.  On the right, from back to front, is where we planted cherry tomatoes, brandywine tomatoes, two sweet banana peppers, an eggplant, two basil, two parsley, a dill, six cilantro, and 28 edamame plants.  Yes, 28.  We might live to regret that, but we had the room and the seeds, so we'll see how that goes.  We're waiting a couple of weeks to plant the cucumber, zucchini and butternut squash.  They'll go in the back.

The other highlight of Saturday was planting these babies (I caved).
They're sprucing up a shaded, woodland area in need of some attention.  I put them to the left because that area gets some morning sun.  Now I am on the hunt for a few more plants for the right side. 
We moved some lilacs out of that spot last fall.  I'd like to see something that blooms, maybe later in the spring or summer.  Astilbe?  I'm not sure what my options are, so I'll have to do some research.  Any suggestions?